Tips & Tricks to Fix Corruption due to Table Partition Error in SQL Server 2005

Microsoft SQL Server 2005 is developed with extensive features of table partitioning that enables you to increase the performance of large databases as these partitioned tables have good flexibility and are easy to handle. There are some cases where users have to face corruption due to table partition error in SQL Server 2005. So here in this article, we will discuss the reason and solution of table partition error in SQL 2005. But before we move further let’s understand the database table partition in SQL Server.

Database Table Partitioning in SQL Server:

Database table partitioning in SQL Server is a process of dividing large tables into smaller multiple chunks. Partitioning tables helps to increase the speed of loading and Archiving data. It also reduces the overall response time and enables its users to perform SQL operations easily.

DBCC CHECKTABLE Command is executed to check the consistency and integrity of the tables. And if there is a need to restore or recover the data then the user can use the recent database backup.

Let us understand the situation with an example. Consider that you have two partition tables named as Table A and Table B both the tables have the same columns and the partitioned against the similar column. The user-created the clustered index on table B and leave It. After that, the data is imported to table B with the help of the BULK INSERT command including the TABLOCK option. This leads to damage to the data, and the user will receive an error as ID 8984 or 8988.

Probable Factors for the “Corruption due to table Partition error in SQL Server 2005”

The users face these issues when the metadata of the two tables do not match properly or match incorrectly. When users drop the clustered index of Table B, its metadata gets modified. Then when you change the partitions between tables, the metadata information gets matched incorrectly and at this instant user receives the data corruption errors.

So now, after knowing the reasons behind the corruption, let’s begin with the solution for the corruption due to table partition in SQL server.

Manual Solution to Solve the Table Partition Error

To solve the data corruption issue execute the DBCC CHECKTABLE command. Before moving ahead let’s see how the command DBCC Checktable works.

How Command DBCC CHECKTABLE works

 Before we discuss further it is important to understand some basics about the Database console command.  To perform Command DBCC CHECKTABLE you need to execute DBCC CHECKDB Command. The command DBCC CHECKDB helps you to inspect the logical and physical integration of all the objects in a certain database. Now, check how this command works using these simple steps:

  • Run DBCC CHECKALLOC ON THE Database.
  • Then, the DBCC CHECK CATALOG will execute on the database.
  • Justify or verify all indexed access contents within the database.
  • Checks the link-level steadiness between the metadata of tables, directory of file systems, and files at the time of saving the max data or varbinary data in the file system with
  • Test the service broker data in the SQL database.

But even after executing the command, your problem is not resolved. Professionals suggest deleting the damaged table if a backup copy is available to you. If there is no backup or damaged backup, the best solution is to get them back with the use of professional utilities such as SQL Database Recovery Software.

This SQL recovery tool is an exclusive product supported by the Windows platform that performs recovery of damaged SQL database. It recovers the entire data from corrupted SQL database files. The tool recovers the objects of the SQL database without any hassle.

Conclusion

Here in this blog, we discussed reasons and solutions to corruption due to table partition error in SQL Server 2005. I hope this guide will provide all the required solutions for your concern.

Mozilla will launch its own VPN service soon

Mozilla reports that its VPN service will finally be launched officially, and will happen in the next few weeks.

The product was renamed and is now called not the Firefox Private Network, but the Mozilla VPN, and the name change, in fact, is associated with a change in the development course. The fact is that Mozilla decided to abandon the idea of creating a VPN extension for Firefox and went on to develop a full-fledged VPN client that can cope with the traffic of the entire OS, including other browsers.

Currently, the service is available for Windows, Chromebook, Android, iOS and Firefox, but the developers have plans to create a Mac client and Linux solutions that they want to present at the same time.
When Mozilla VPN leaves beta, the service will be available only to users from the United States. Launch VPN in other countries and regions is promised before the end of this year.

In terms of cost, the manufacturer said it will continue to offer Mozilla VPN at current prices for a limited period of time, which will protect up to five devices on Windows, Android and iOS at a price of $ 4.99 per month.

Let me remind you that the Mozilla VPN project started last fall. The beta version was available only to residents of the United States, but Mozilla reports that users from more than 200 countries around the world also registered on the waiting list .

An organization’s VPN works by routing traffic through a trusted proxy network. Thus, the browser extension uses Cloudflare servers, while a full-fledged VPN relies on Mullvad servers and the open source protocol WireGuard VPN, which was added to the Linux kernel earlier this year.

After launching a beta version of the service last year, Mozilla was faced with many questions about how the service would work. Now, developers have launched special FAQ and support pages, both for expansion and for a fully functional VPN, where users can find the answers.

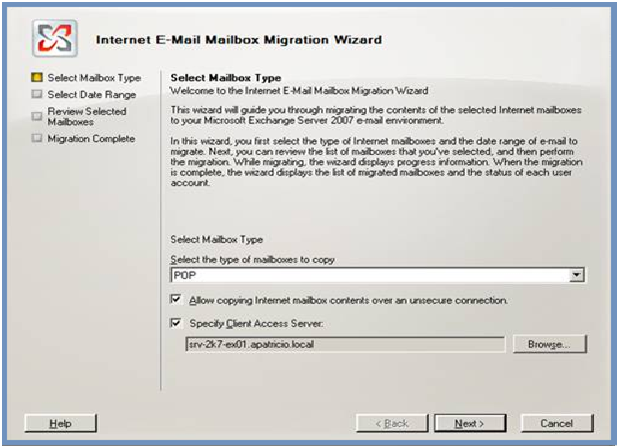
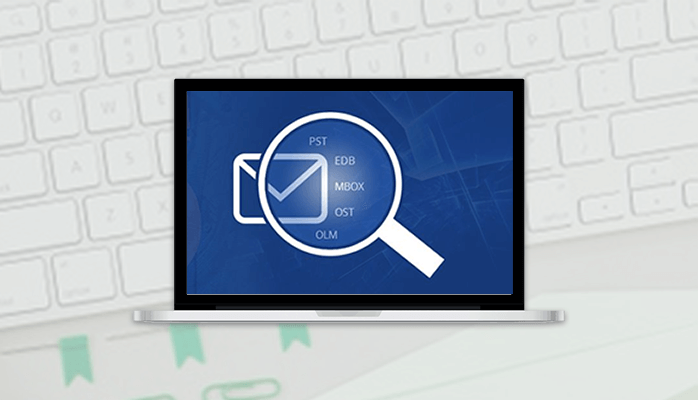
Two Free Methods to Convert NSF to PST Files

In this technical blog, we will discuss the two best methods to convert NSF to PST files Without Lotus Notes. We will describe the methods in the form of steps so that you can follow them easily. But we suggest you take the help of Professional tools for converting NSF file to Outlook PST file.

Many organizations found an advantage in an email platform that gives more ease to the user with their interactive interface. If we compare this with the other email clients then, it is seen that the use of other email clients is more complex and boring due to their interface. If an organization moves to work on an interactive GUI email platform then this will also help in boosting the working efficiency of the company. Hence, many organizations move from one email client to others as they find another email client more suitable and efficient for their work.

But switching is not easy to do the task. It takes migration of emails from one email client to another after converting them to their formats. Not all email clients work on the same platform. So, it is necessary to convert the format of emails as per the new email client before you transfer them. And here you’ll see one such migration i.e, from IBM Notes to MS Outlook.

As we tell you above, that both these email platform, i.e. Lotus Notes and Microsoft Outlook they both run on different file formats.

  • Lotus Notes supports NSF file format.
  • Microsoft Outlook supports PST file format.

Hence, in order to migrate NSF databases in Microsoft Outlook, you have to change the file format from NSF to PST format.

Purpose Behind the Migration of IBM Notes to MS Outlook


  1. Lotus Notes provides a complex interface as compared to Microsoft Outlook.
  2. In the case of a Lotus account, one can’t log in different accounts whereas, in Outlook, users can easily perform this task.
  3. It is a standalone email client and you need to purchase it, while Outlook is freely available with Microsoft Office suite.
  4. Lotus Notes maintenance is more as compared to Outlook.
  5. Any novice user can run Outlook application but to run the Lotus Notes user needs good technical knowledge.


Techniques for Migration of NSF to PST


If you want to migrate from IBM Lotus Notes to Outlook, then you have to transfer NSF to PST. Below we have described you the Manual Approach or the Alternate approach to switch from IBM Notes to MS Outlook.

Manual Method – Convert NSF to PST

You have to take the help of the Microsoft Transporter suite in case you don’t want to export IBM Notes NSF file to PST without the use of Lotus Notes. It is the free utility to migrate data from Lotus Exchange Server to Microsoft Outlook. Go through the below steps carefully:

  • Download the msi as per your Operating system of 32-bit or 64-bit.
  • For installation, choose the downloaded setup >> Next. Then, tick the mark on the checkbox below.

  • Choose Transporter for Internet Mail and browse the location. Then, press the Next button.
  • After that, Open the Microsoft Transporter Suite.

Create a CSV file that holds the following fields:


  • Now, select the .csv file that you have created and add mailboxes option and import.

  • On the left of the screen, you’ll see a hierarchy of files. Then, from the tree structure click on Mailboxes.

  • Then on the right-hand side of the screen, hit on Migrate selected Mailbox.
  • Then, select POP from the drop-down menu. Also, check-mark the below options >> click on Next.

  • After the selection of emails from the given data range, hit on Next to proceed.

  • You will get a preview of the mailbox, click on Migration to initiate this process.
  • In the end, there is a new Window open after the completion of migration, there you click on the Finish button.

This manual method helps you to easily migrate NSF files into PST file format only if you are a technical user. But if you are not a technical user then you may face some issues as given below:

Drawbacks of Manual Method

  • Time Consuming.
  • Risk of loss of data.
  • Very lengthy procedure.
  • Doesn’t support all versions of Outlook.
  • An issue of missing attachment or document.

If you don’t want to follow these lengthy methods then you can take the help of third-party NSF to PST Converter tools. Migration through the manual help is quite complicated and your one mistake can lead to data corruption. So, as per the expert’s advice, it is recommended to use professional tools. This software allows you to convert from NSF to PST and several other file formats.

 Wrap Up

In this technical article, we have discussed the method to convert NSF to PST file format. We complete this process without the help of Lotus Notes. If you take the manual help for migrating or converting your emails then this enhances the chances of data loss. So, it is highly recommended to use the Professional NSF to PST converter tool for fast and secured migration. I hope this article solves your query.


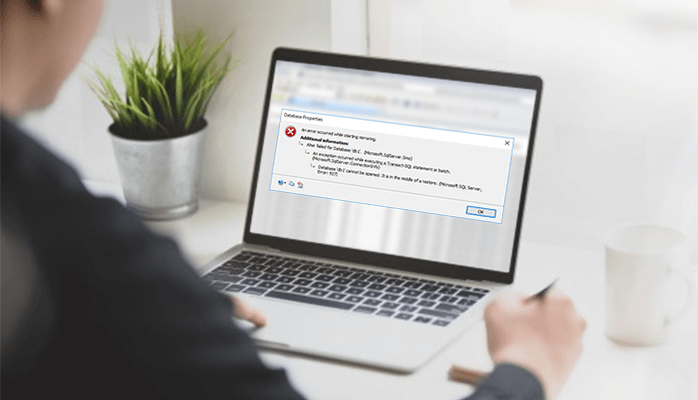
Fixed: Database Can’t Be Opened as It is in The Middle of a Restore

An SQL Server Administrator executes database restoration when some information from the database is missing. The restoration procedure requires the SQL computer file and transaction logs to revive the database data because it was present before deletion. In some cases, when the restoration is complete, and you try to access the data, then you may get the following error message:

Database ‘DB5343’ cannot be opened. It is in the middle of a restore.

The error occurs because the administrator used the NO RECOVERY mode for the restoration and it doesn’t allow the usage of the database. So, you ought to now use WITH RECOVERY mode for database restoration because it will make the database accessible to the user.

T-SQL statement for restoring database WITH RECOVERY option

Although the WITH RECOVERY option is activated by default with the complete restore procedure, you’ll mention within the command also.

RESTORE DATABASE DB5343 FROM DISK = ‘C:\DB5343.BAK’

WITH RECOVERY

GO

Recover a database from the ‘restoring’ state

If the database is in the ‘restoring’ state and is not available to users, you should run the command to make it accessible to users.

RESTORE DATABASE DB5343 WITH RECOVERY

GO

Restore multiple backups using WITH RECOVERY

SQL Server restoration using the NORECOVERY option can restore the database from numerous back-ups, except in the last step. Using WITH RECOVERY within the last action restores all transaction logs to bring the database online.

RESTORE DATABASE DB5343 FROM DISK = ‘C:\DB5343.BAK’

WITH NORECOVERY

GO

RESTORE LOG DB5343 FROM DISK = ‘C:\DB5343.TRN’

WITH RECOVERY

GO

When the restoration process is completed, then by using WITH RECOVERY command, the database should be online and accessible.

Restore using SQL Server Management Studio

You can perform the task using the WITH RECOVER option using SQL Server Management Studio. Here is the process:

  • Start the Studio from the program and go to Databases on the menu list. Right-click the databases and click the Restore database option.
  • Select the option ‘From Device’ and then click the Browse button the go to the location of the backup file which you had recently created.
  • In the Specify Backup wizard, select the backup file and click the OK button.
  • Now, in the destination for the restore section select the database where you want to put the recovered data.
  • In the Restore options, check the choice ‘Overwrite the prevailing database (WITH REPLACE).
  • In the Recovery state, select the option ‘Leave the database ready to use by rolling back uncommitted transactions. Additional transaction logs cannot be restored’.
  • Click OK and let the restore procedure complete.
  • Perform an equivalent procedure for every computer file which you would like to revive for the database.

Check if the database is live and accessible to users

After using the two methods, you can restore the database in a healthy state, but if any of these methods do not work, then you need to use a professional SQL Recovery tool that can remove the error from the SQL database and restore it in full health. This tool is a standalone software that can access the database files of SQL server and safely recover it.

Summary

This blog is about how to solve “Database Cannot Be Opened as It is in the Middle of a Restore” error for Microsoft SQL Server.

To resolve the error message “Database Cannot Be Opened as It is in the Middle of a Restore” in Microsoft SQL Server, you can try the following steps. First, check if any ongoing restore operations are running on the database and wait for them to complete. If there are no active restores, you can try restarting the SQL Server service. Additionally, ensure that the database is not set to the “RESTORING” state by running the “RESTORE DATABASE” command with the “WITH RECOVERY” option. If the issue persists, you may need to restore the database from a backup or contact Microsoft support for further assistance.

I hope you find this blog helpful to solve your problem.

Workarounds to Encounter “Instant Search doesn’t display any results” in Outlook

When you are trying to use Instant Search in MS Outlook 2007, 2010, or 2013, users may get the following messages in the  Indexing Status dialog box:

Instant Search doesn’t display any results

  • “No matches found.”
  • In this, the moment Search doesn’t display any results “Search results could also be incomplete because items are still being indexed.”
    In this, the Instant Search encountered a problem and works only partially.

One reason behind the Outlook search not working can be a problem in Window Indexing service. And to repair the search problem, you’ve got to rebuild the “Index” created by the indexing service.

Rebuilding the Index

The best method to unravel this problem is rebuilding the index, which can automatically fix all other minor problems. So, to rebuild the index, you have to follow these simple steps;

  • Navigate to Control Panel and click “Indexing Options.” A panel will appear like this:
  • Now, choose the “Advanced” option to rebuild the index. A panel will display on your screen showing the “Rebuild” button. Click this button to start the rebuilding process.
    The rebuilding process can take several hours for completion. So, it’s better to stay the system at rest until the rebuilding process is completed.

Apart from rebuilding the index, other alternatives are also present if you would like to ignore the long process of rebuilding the index.

1.     Remove the Window Search Feature and Install Again

One basic cause of this problem is often the damaged Windows Search option. So, if the installation of the Windows Search got damaged, you can remove and reinstall it easily. If you’re a Windows 7 user, then execute these steps to reinstall the window search feature;

  • Go to Control Panel>>Programs and click on “Turn Windows features on or off” in the left pane of the screen.
  • Now, deselect the “Windows Search” option from the list and click “OK” to uninstall the Windows search option.
  • Now reboot your system
  • Once the system reboot is completed, you’ll enable this feature with an equivalent process.

However, if you are using Windows 8 or 10, then you will not find the “Windows Search” option in the programs. For Disabling “Windows Search” in Windows 8 or 10, execute these steps:

  • Open the Run Window by Pressing Window Button + R, type services.msc in it, and click on “Ok.”
    Scroll down to “Windows Search” in the displayed window and double-click on it.
  • A window will be displayed on the screen, now find “Startup type:” and select “Disable.” Then click “Stop” to stop the service and click “Apply,” and then Restart the computer. The “Window Search” option is going to be disabled from your PC. You can turn it on, by following the same steps.

2.     Ensure that Indexing is complete

The second option to solve this problem is to check if the PST file or mailbox is indexed or not. To check for index marking, you’ll execute these steps;

  • In Outlook 2010
    • Launch Outlook and click on the “File” option from the up left corner.
    • Now, navigate to Options>>Search>>Indexing options>>Modify>>Expand Microsoft Outlook.
  • A list is going to be shown in Microsoft Outlook; you’ll need to confirm that the PST file or mailbox is displayed and marked on the list. And if it is not listed, then you’ll have to recreate your mail profile.
  • In Outlook 2013 and Outlook 2016
    • Launch Outlook and click on the “File” option from the up-left corner.
    • Now, click Options, and navigate to Search Section>>Indexing options>>Modify
      In the indexing option, you have to make sure that Outlook is selected because Outlook 2013 and 2016 don’t provide you the option to index specific mailboxes or PST files. So, you have to index the complete Outlook.

3.     Check for corruption in PST Files

If the Outlook isn’t displaying the right results even after marking the PST file, it might be due to corruption in the PST file. In order to repair this, you have to fix your corrupted PST file. There are several methods to repair a PST file, but the simplest method is to use Mailconvertertools’ PST Repair Tool. This Outlook PST repair tool can assist you to repair any corrupted PST files.

While the PST file is recovery, open Outlook and checks for indexing. To check for indexing, follow these steps;
Open Outlook, click Tools>>Instant Search>>Indexing Status
However, if the size of the PST file or Mailbox is too big, then it can take some time for the indexing. If it’s showing that the PST files and Mailboxes are indexed, then you’ll not face this problem again.

4.     Reset the Index

Even after rebuilding the index, if the moment Search doesn’t display any results, then try restoring defaults. The difference between “Rebuild” and “Reset” is that aside from resetting all customize indexing settings, the reset method also will recreate the particular index files follow these steps to reset the Index.

  • Type “Troubleshooting” in the search bar
  • On the left pane of the window screen, you’ll see “View All.” Click this button.
  • A list of options will be shown up, select “Search and Indexing” from it.
  • Click “Advanced“; click “Run as Administrator.”
  • Click “Next” and complete the process by following the on-screen instructions.

The four methods mentioned above are proved to be very useful in solving the “instant search does not display any results” error.